How to connect your Holidu website to your own domain?
Already have a domain you would like to use? Great news, you can now connect it to your new Holidu website!
Before you get started, make sure you have access to your domain provider’s settings (e.g. AWS, Vercel, etc.). Just a quick heads-up: if you already have a website live on that domain, it will be replaced by your Holidu website once this process is complete.
Here’s a simple step-by-step guide to help you connect your domain:
Step 1: Initiate the process in Holidu application by entering the configuration of your Website
- Click on “Enable website” if is not enabled yet
- Click on “Connect my domain”

After you start the setup and enter your existing domain name, you will see a DNS tab appear.
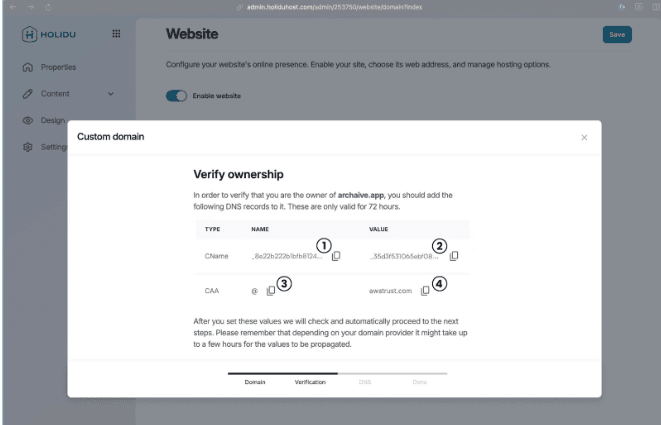
Here, Holidu will generate a few specific DNS values for you.
You will need to copy these values and add them to your domain provider's settings in the next step.
Tip: Don’t worry if you’re not familiar with DNS settings, we will guide you through it in Step 2!
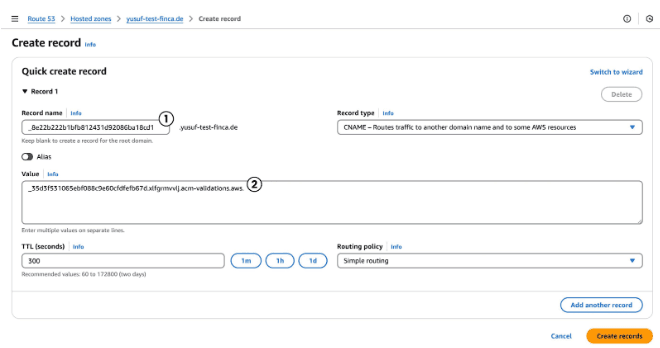
Step 2: Create a new CNAME in your domain settings
Now, log in with your domain provider and look for an option to create a new record or a new DNS record. A mask will open.
- For the “Type” select CNAME
- In the Holidu application, copy the “NAME” value from the CName line (1) and paste it into the name field of the record you want to create
- Then copy the “VALUE” from the same line (2) and add it to the value field of the record you want to create
- The fields “TTL” and “Routing policy” can usually keep their prefilled values
After making those settings, create the record
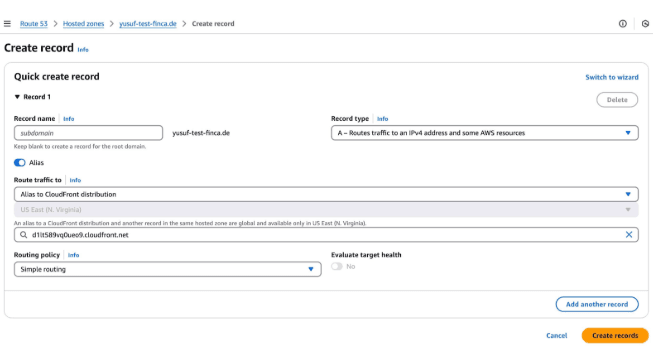
Example (AWS):
Important: If there are already records saved for the domain you want to use, please make sure to delete those.
This will disconnect your existing website from the domain, so it will not be accessible for customers anymore. This step is necessary so you can connect the domain to your new Holidu Website.
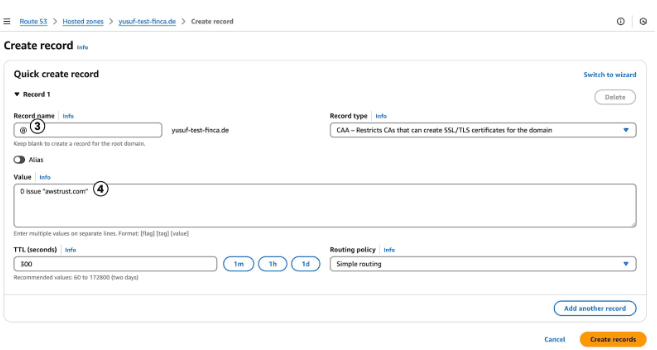
Step 3: Add a CAA DNS record in your domain settings
Create another record in your domain settings. This time:
- For the “Type” select CAA
- In the Holidu application, copy the “NAME” value from the CAA line (3) and copy it into the name field of the record you want to create
- In the value field paste the value you get from the Holidu application (4)
- Some providers might require a special format for the value field, for example 0 issue "awstrust.com". In this case you add the value (4) from above in quotation marks
- The fields “TTL” and “Routing policy” can usually keep their prefilled values
After making those settings create the record
Example (AWS):
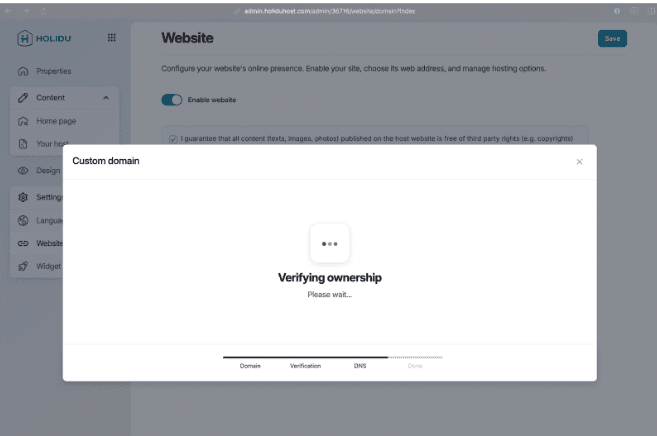
Step 4: Head back to your Holidu application to check if the records are recognized
With the records you just recorded in place, Holidu will automatically check the DNS settings you just added. This process usually takes around 5 minutes.
If everything looks good, your domain will be verified, and you will be guided straight to the final step of the setup.
Almost there!
Step 5: Add an ALIAS DNS record in your domain settings
After Holidu verifies your domain, there is just one more DNS record to add in your domain settings.
Holidu will provide you with the following values:
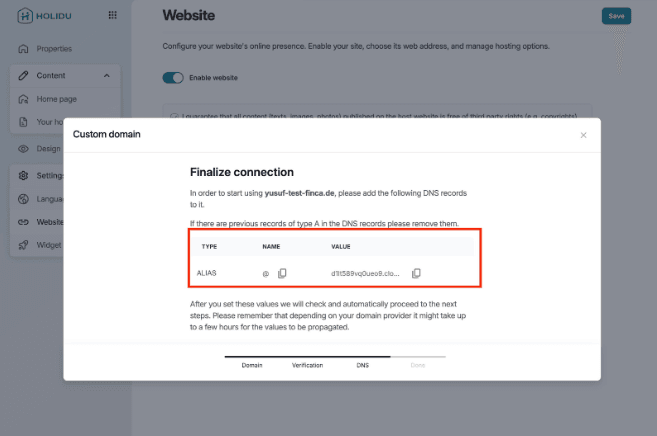
You are almost there, just one more record to go!
Create a new record, change the Type to ALIAS this time.
In the Holidu application, copy the Value provided for the ALIAS record.
Paste it into the Value field in your domain provider’s settings.
Before moving on, make sure your domain provider settings now include the following three records:
- ALIAS
- CAA
- CNAME
All three are needed for your Holidu website to connect properly.
Step 6: Final verification
Head back to the admin UI and wait until the domain is verified.
Holidu will automatically check everything you have set up. This may take a couple of minutes.
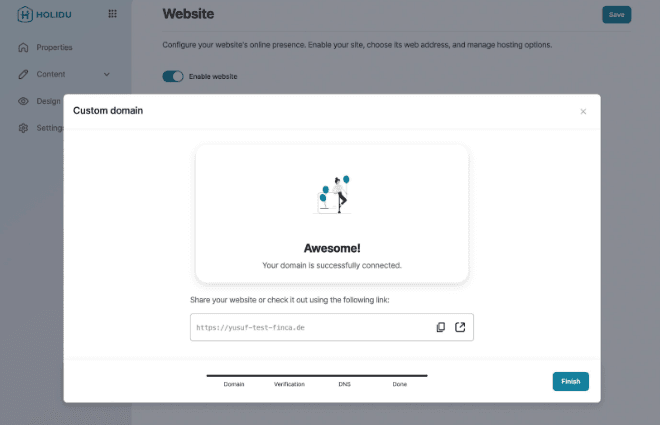
Congratulations, you can now access the Holidu host website via your own domain!
Do you want to contact us?
We’re here to help. You can contact us directly if you need assistance or have questions.
Contact us